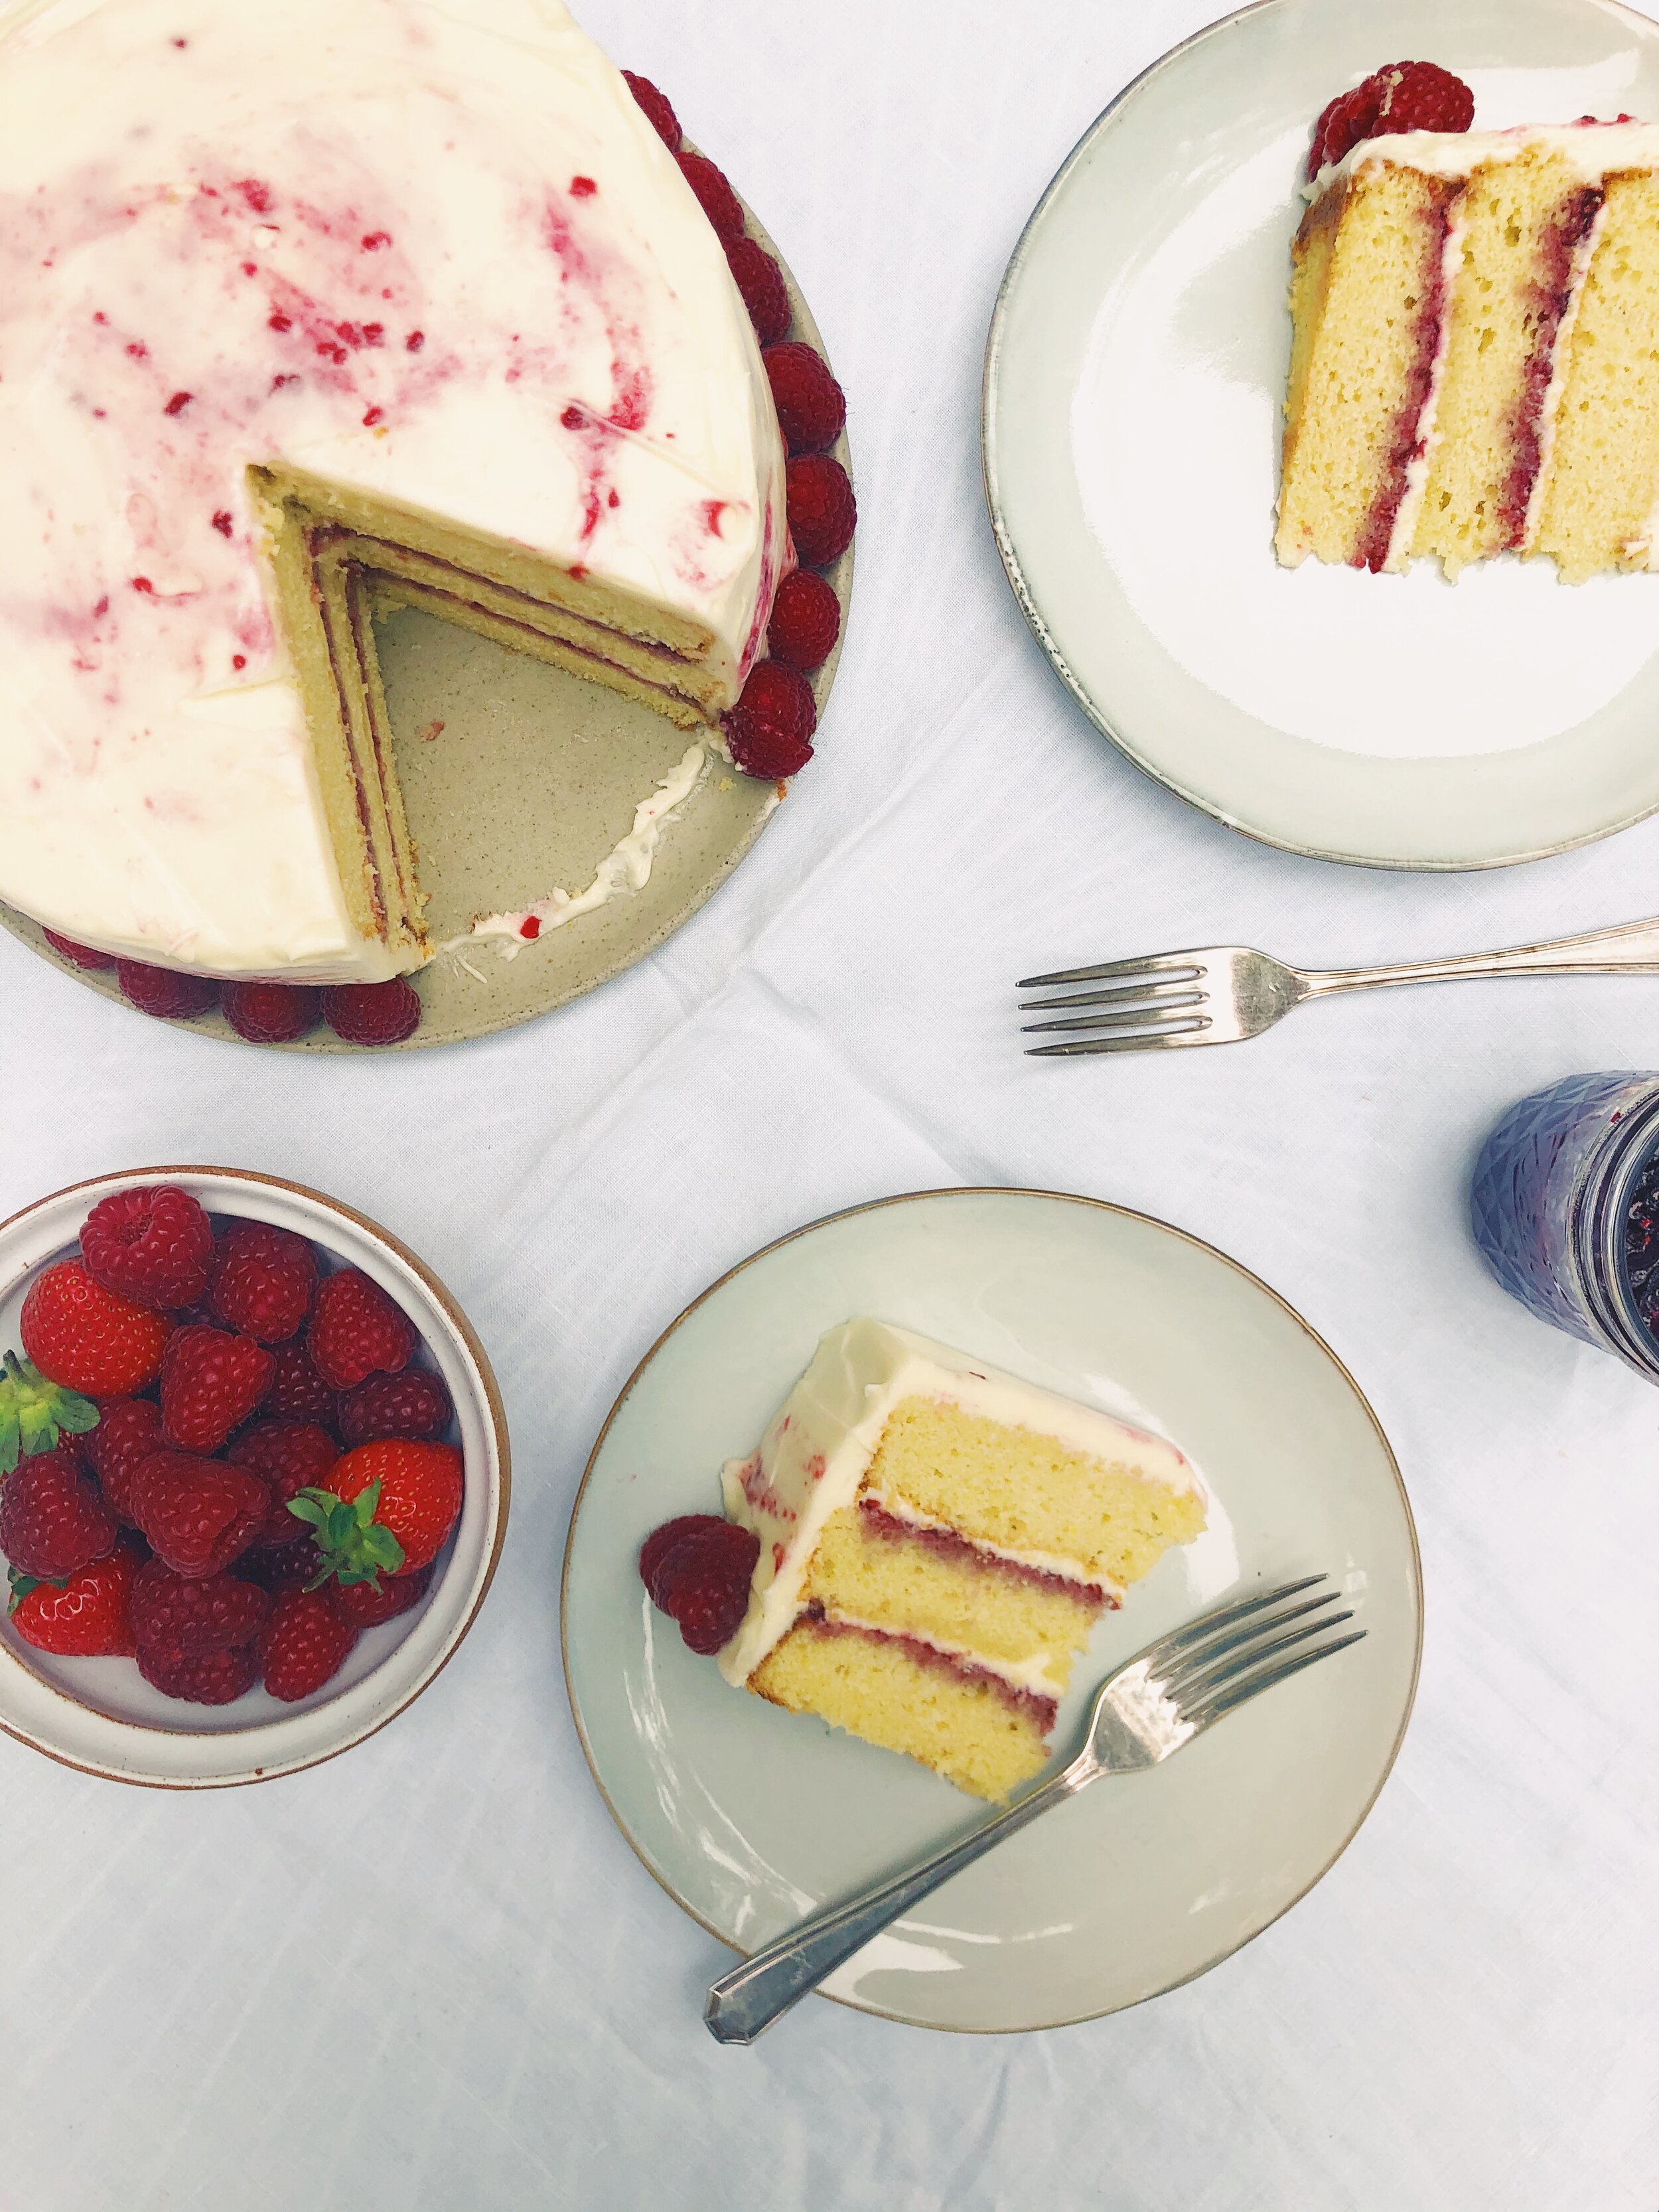
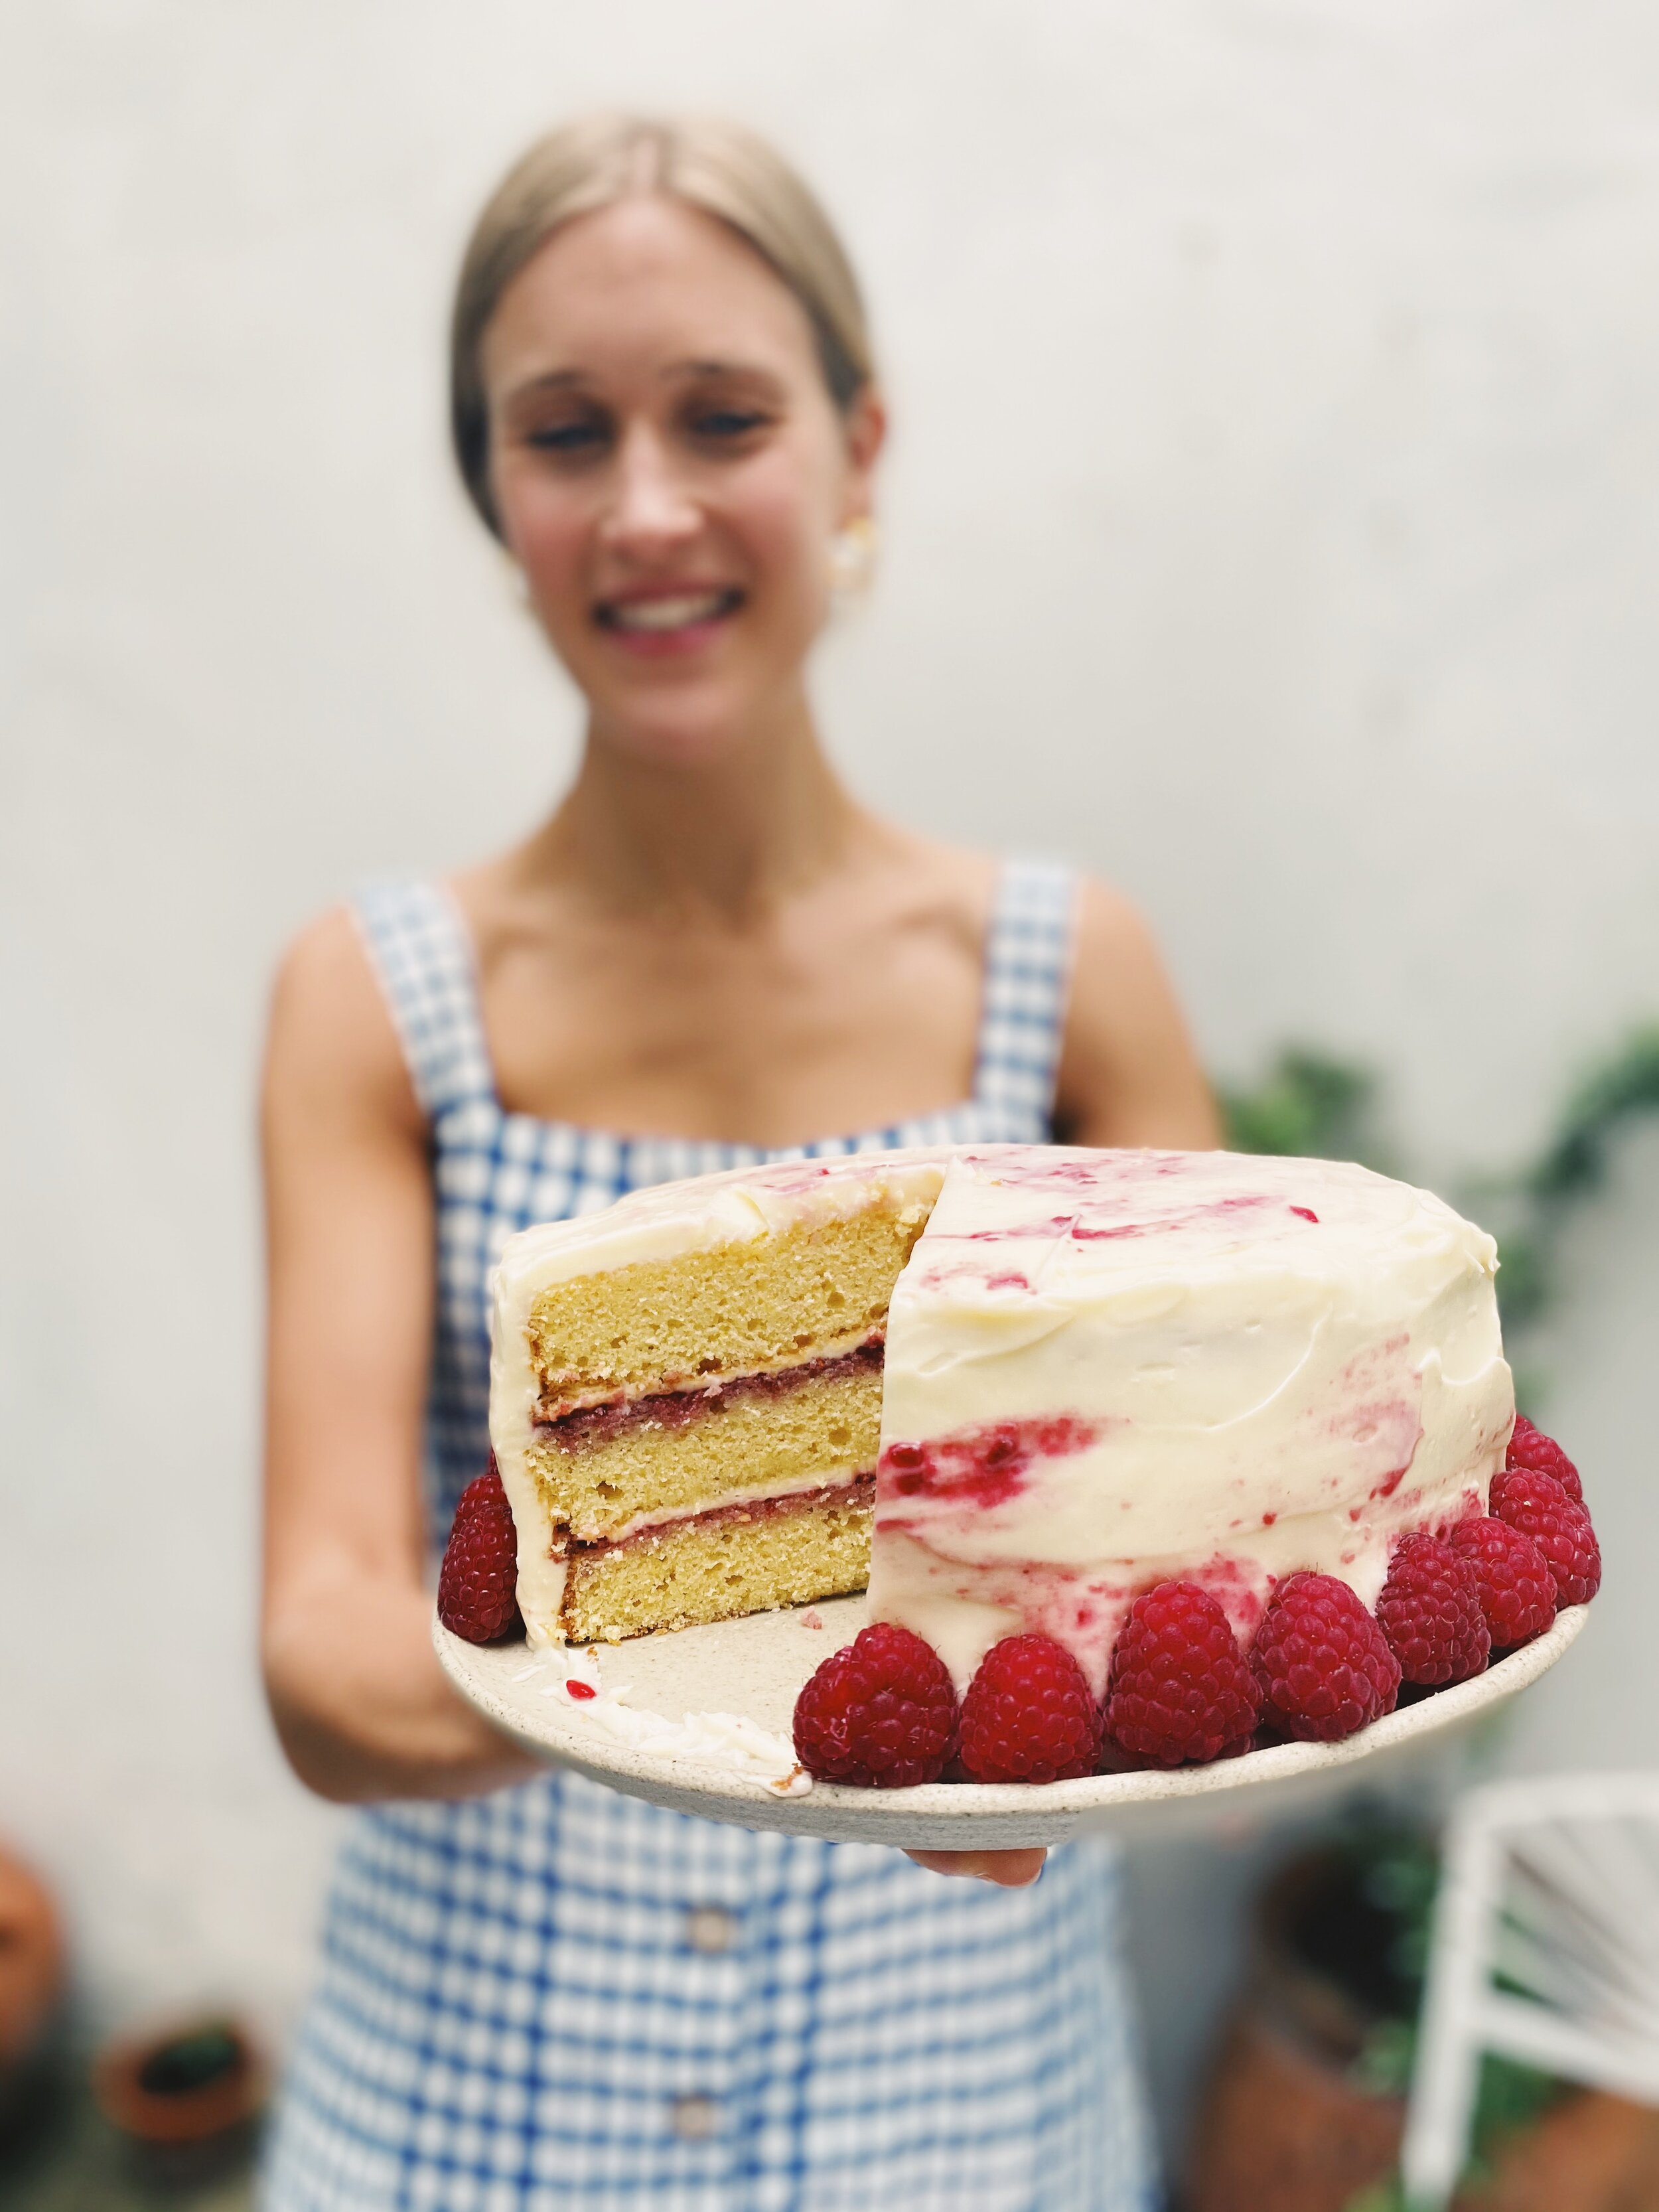
Lemon layered raspberry jam cake with marbled mascarpone icing

This recipe is sponsored by Ball®
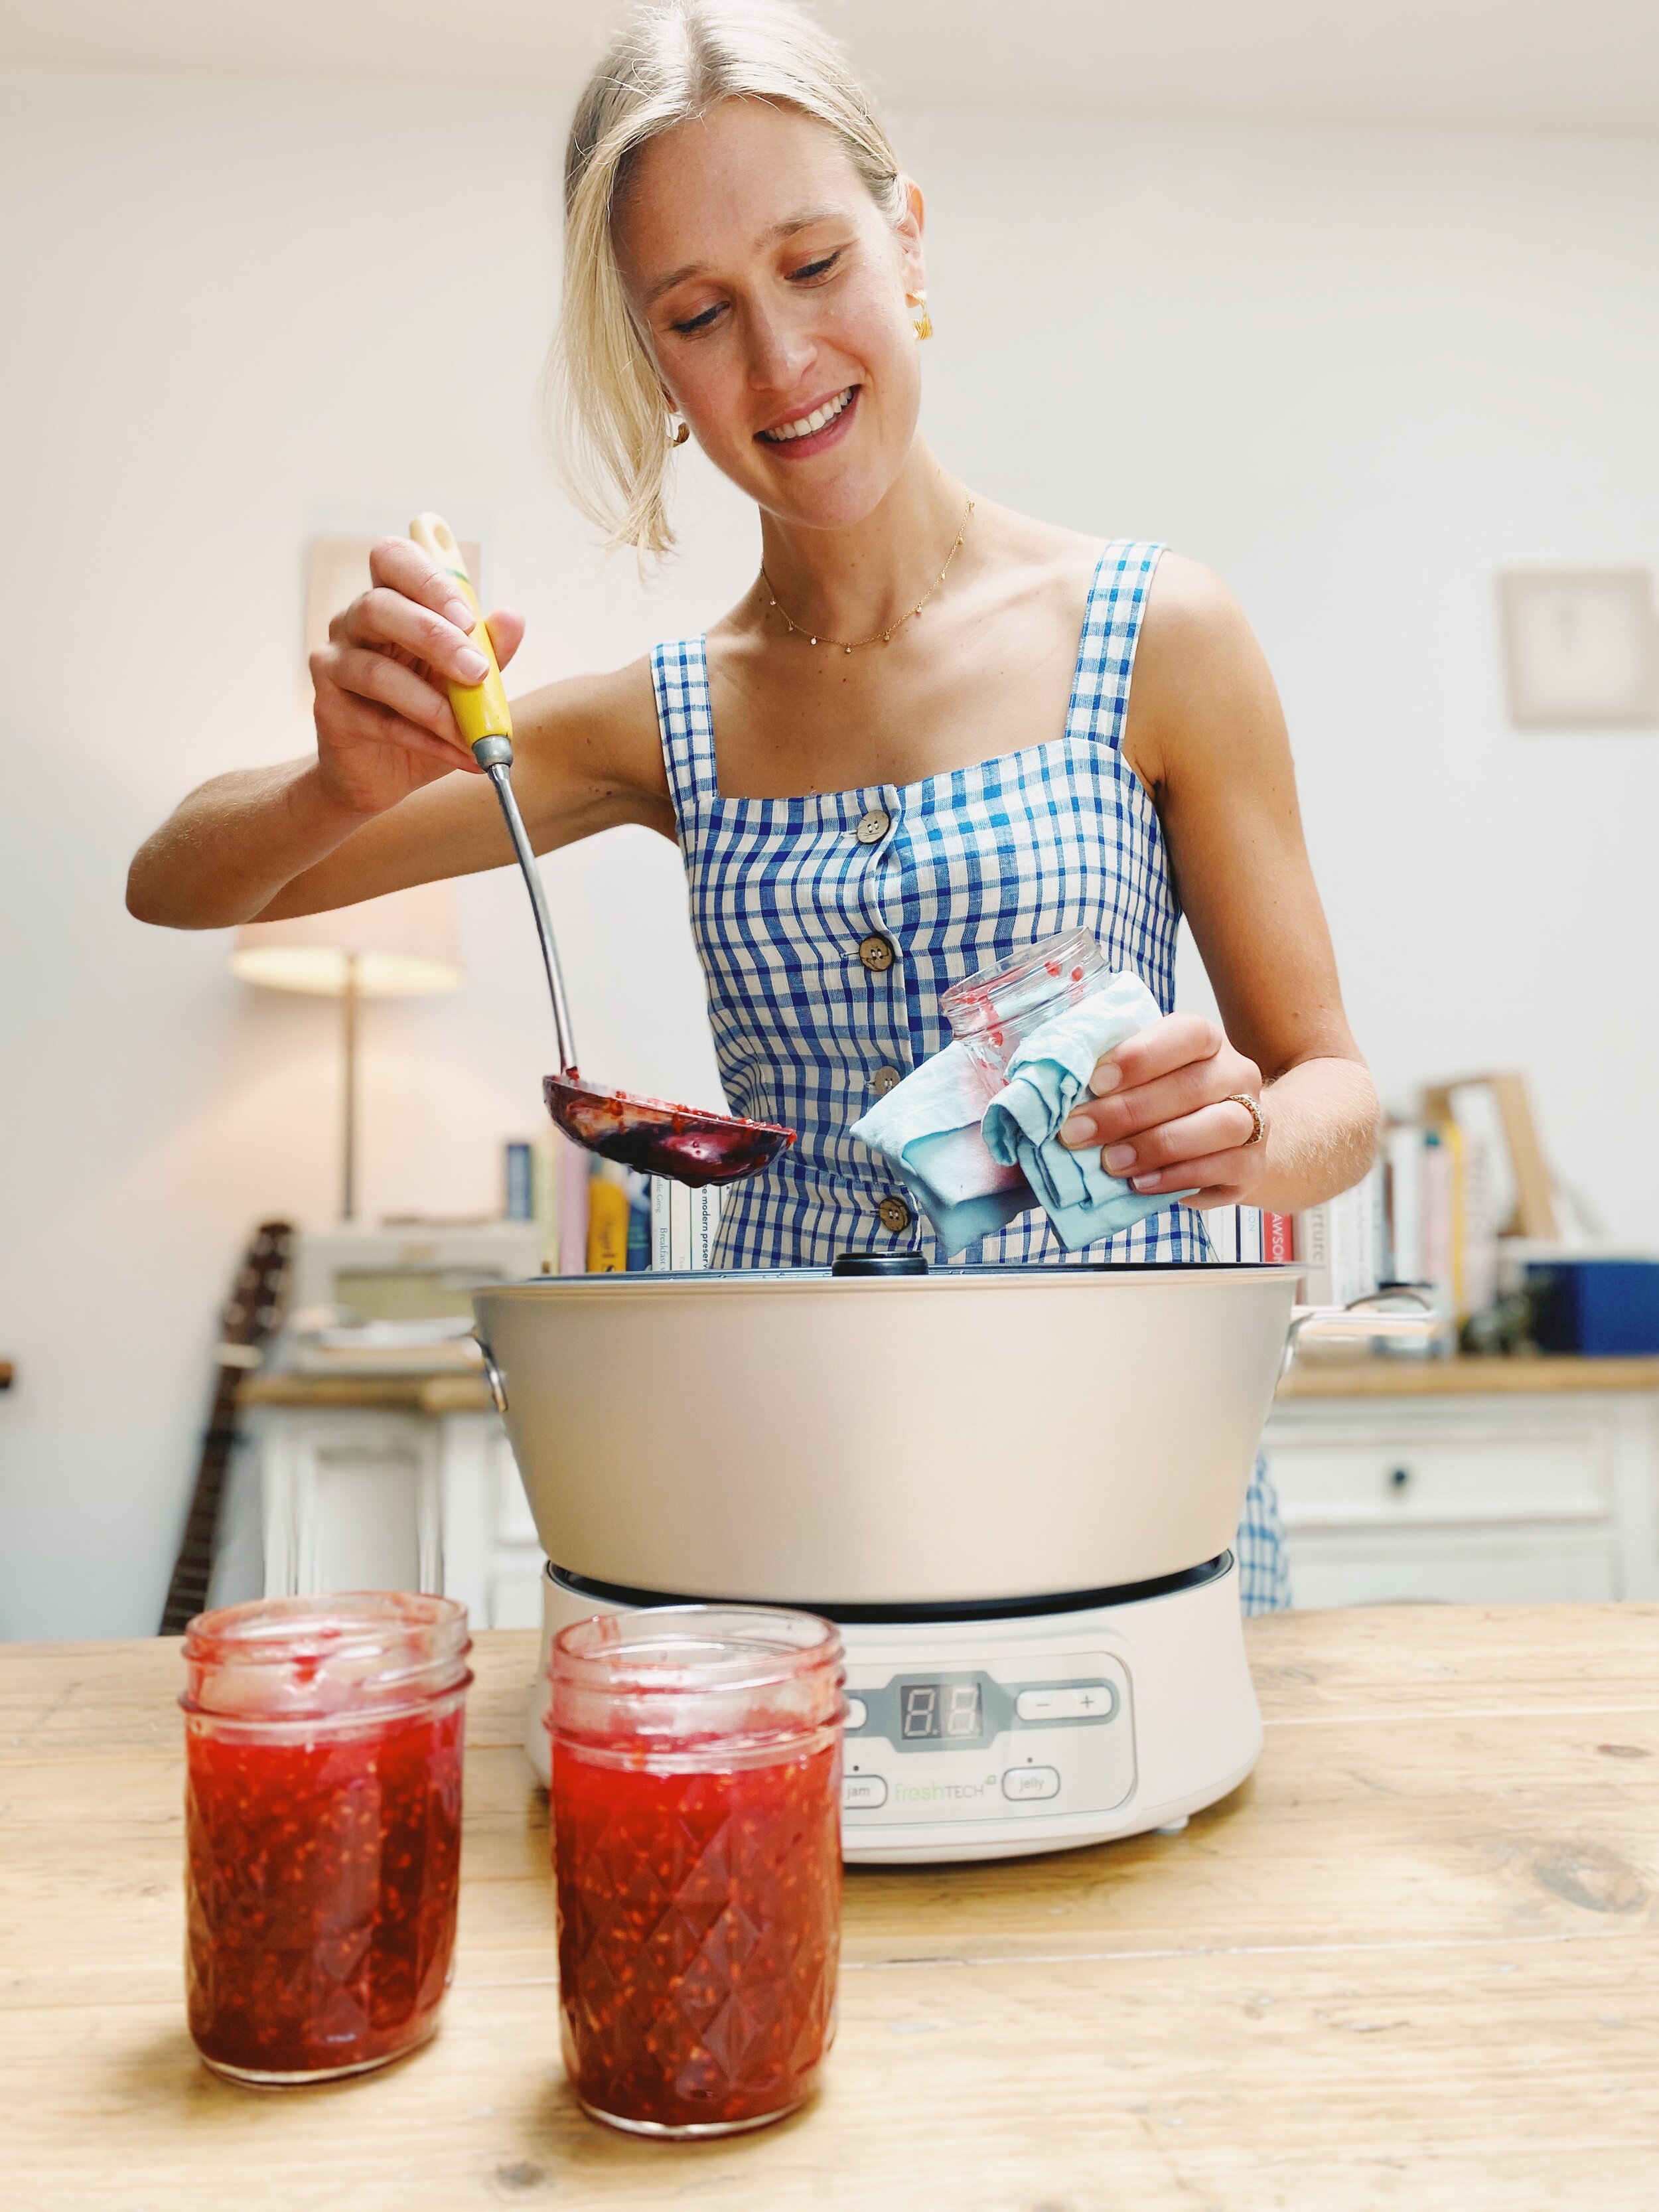
A cake of pure joy. A cake that is perfect for a celebration or simply to bring a bit of sweetness to a midweek tea. I made this for my father’s 60th birthday and it went down a treat. The jam is key here for creating the beautiful marbling as well as those striking pink lines through the sponge. If you can make homemade jam it makes all the difference. I make my jam in less than 30 minutes with the Ball® freshTECH Automatic Jam & Jelly Maker and it couldn’t be easier or more convenient. Faultless every time and zero mess. It uses SmartStir® technology to automatically stir jam or jelly while it cooks so you can just set it and go. It also comes with a book of recipes and tips to help you experiment at home.
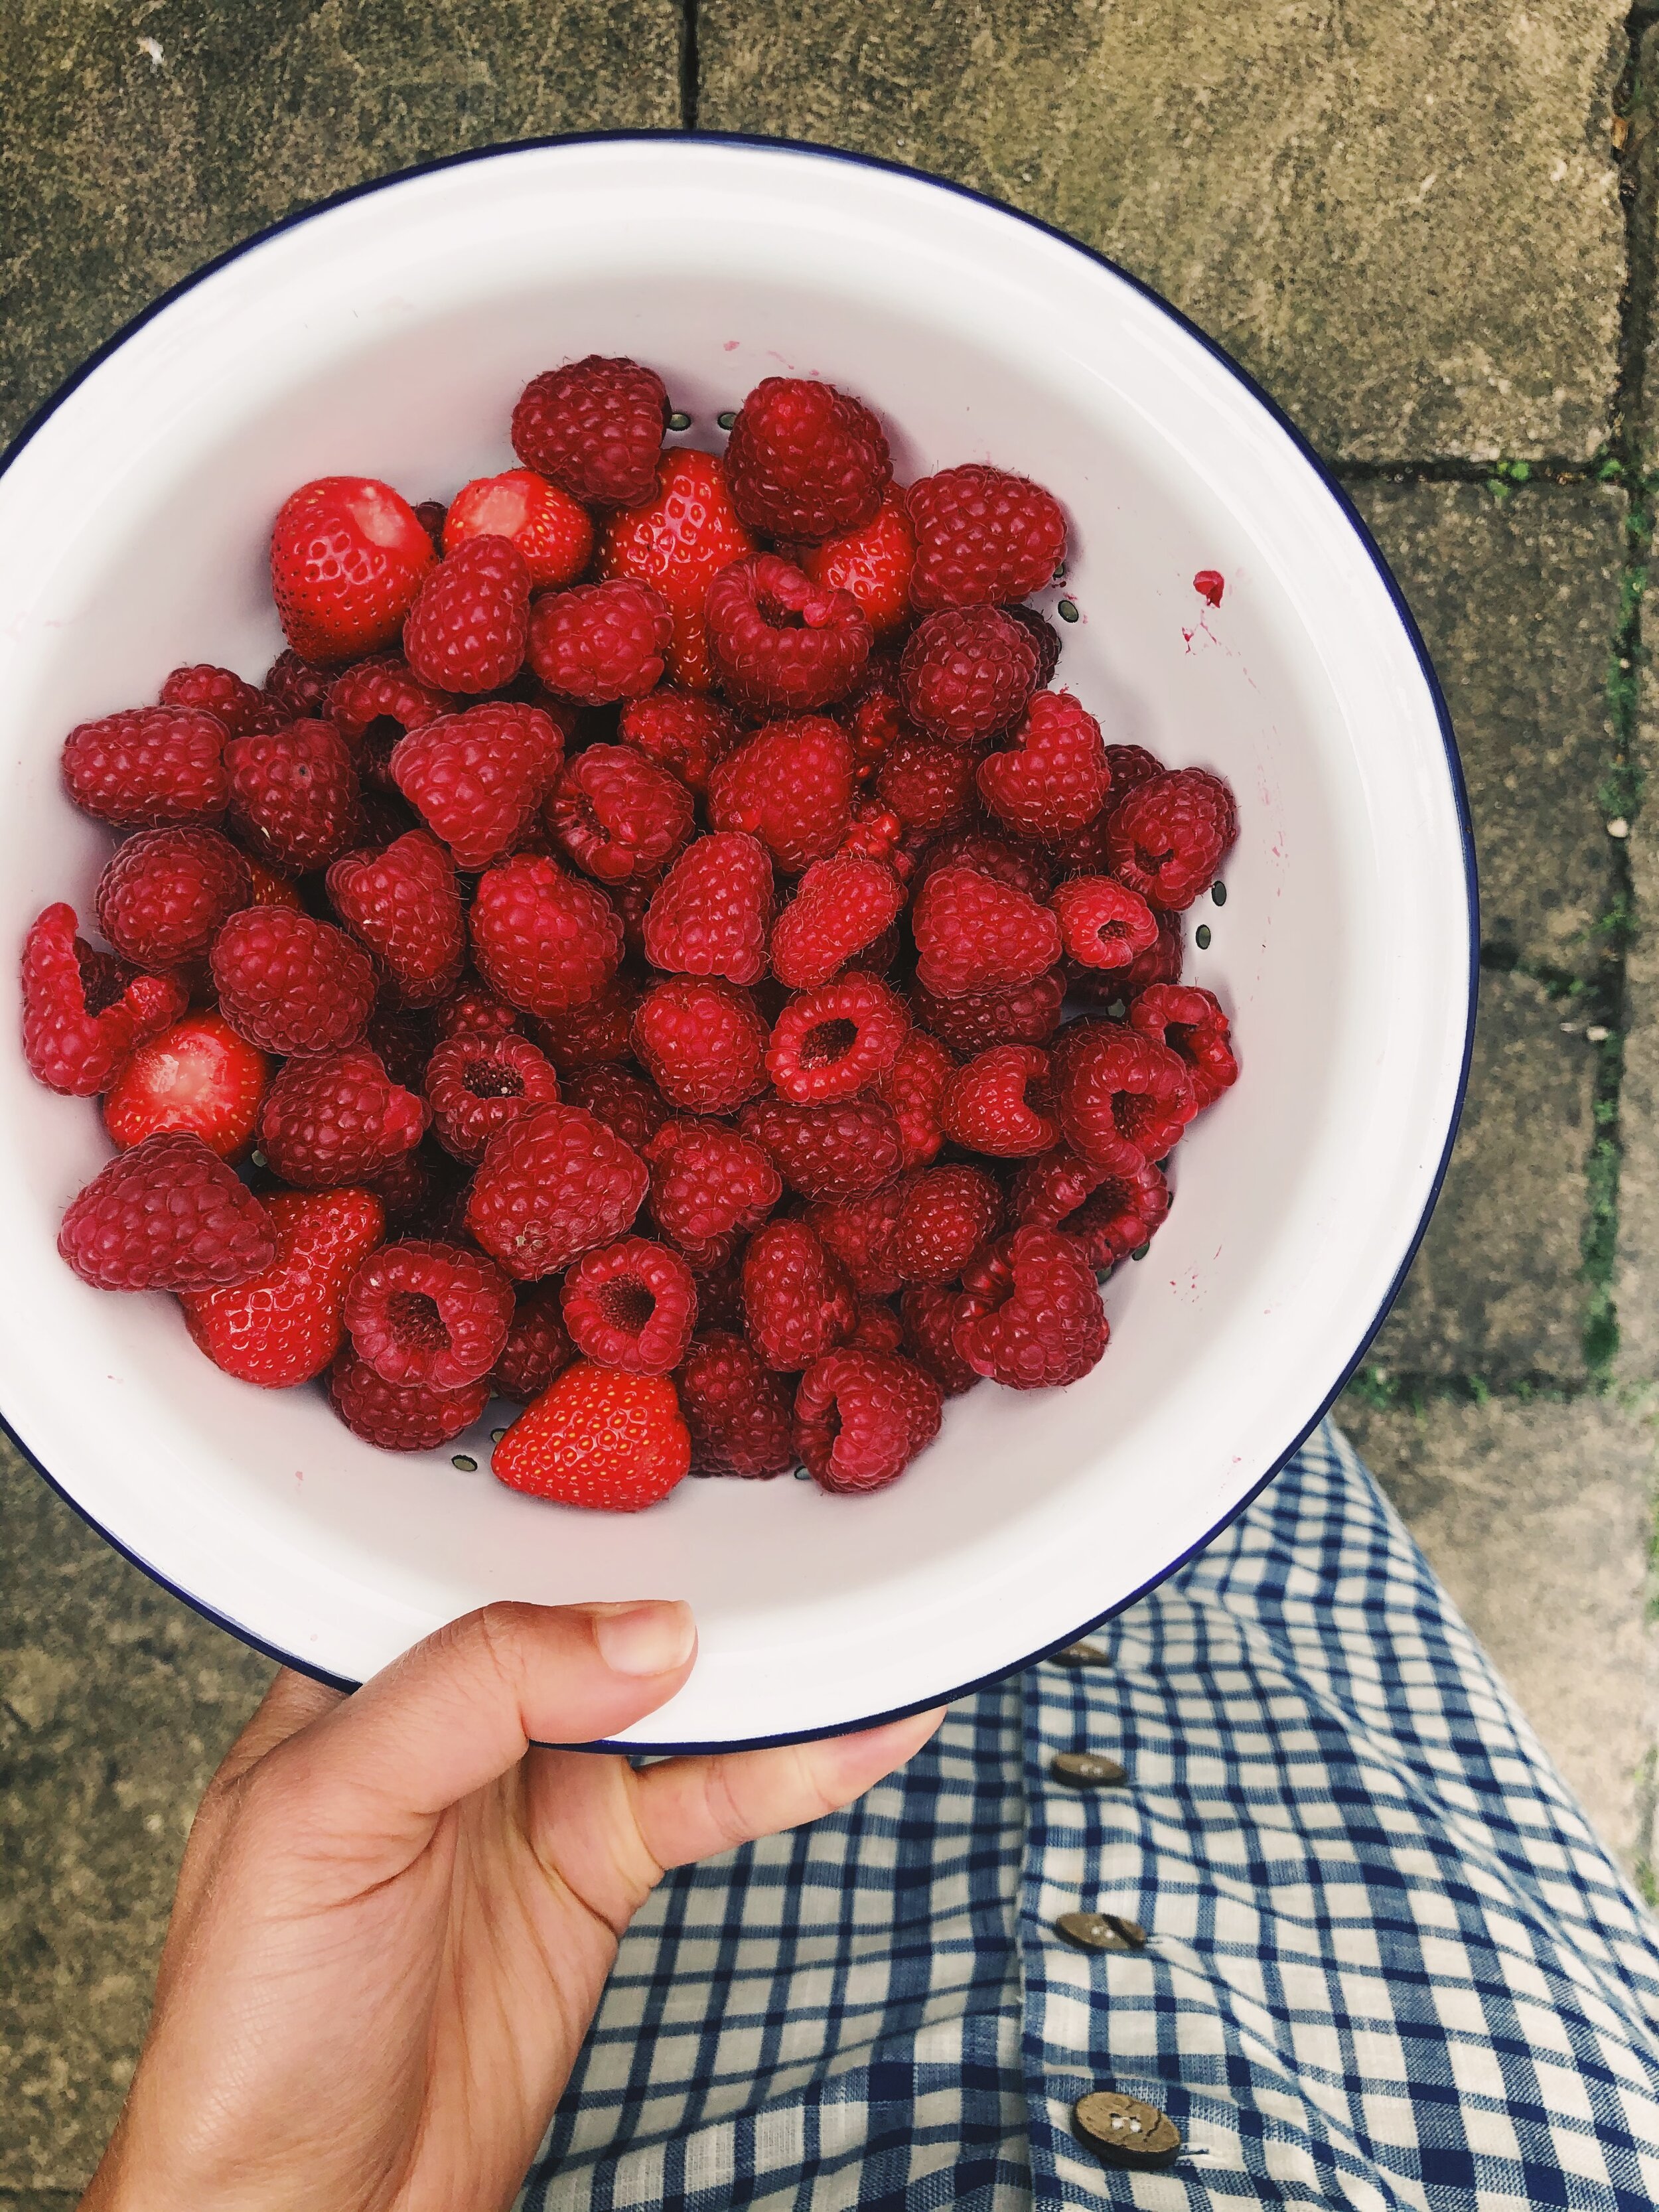
For this recipe I’ve used a mix of raspberries and wild strawberries as my mother had a glut of raspberries from her garden, but any berry jam would work. Once your jam is made you can enjoy them right away or freeze them for up to a year.

Ingredients
For the sponge
300g unsalted butter, softened
300g golden caster sugar
5 eggs, beaten
2 lemons, zest and juice of separated
300g self-raising flour, sieved
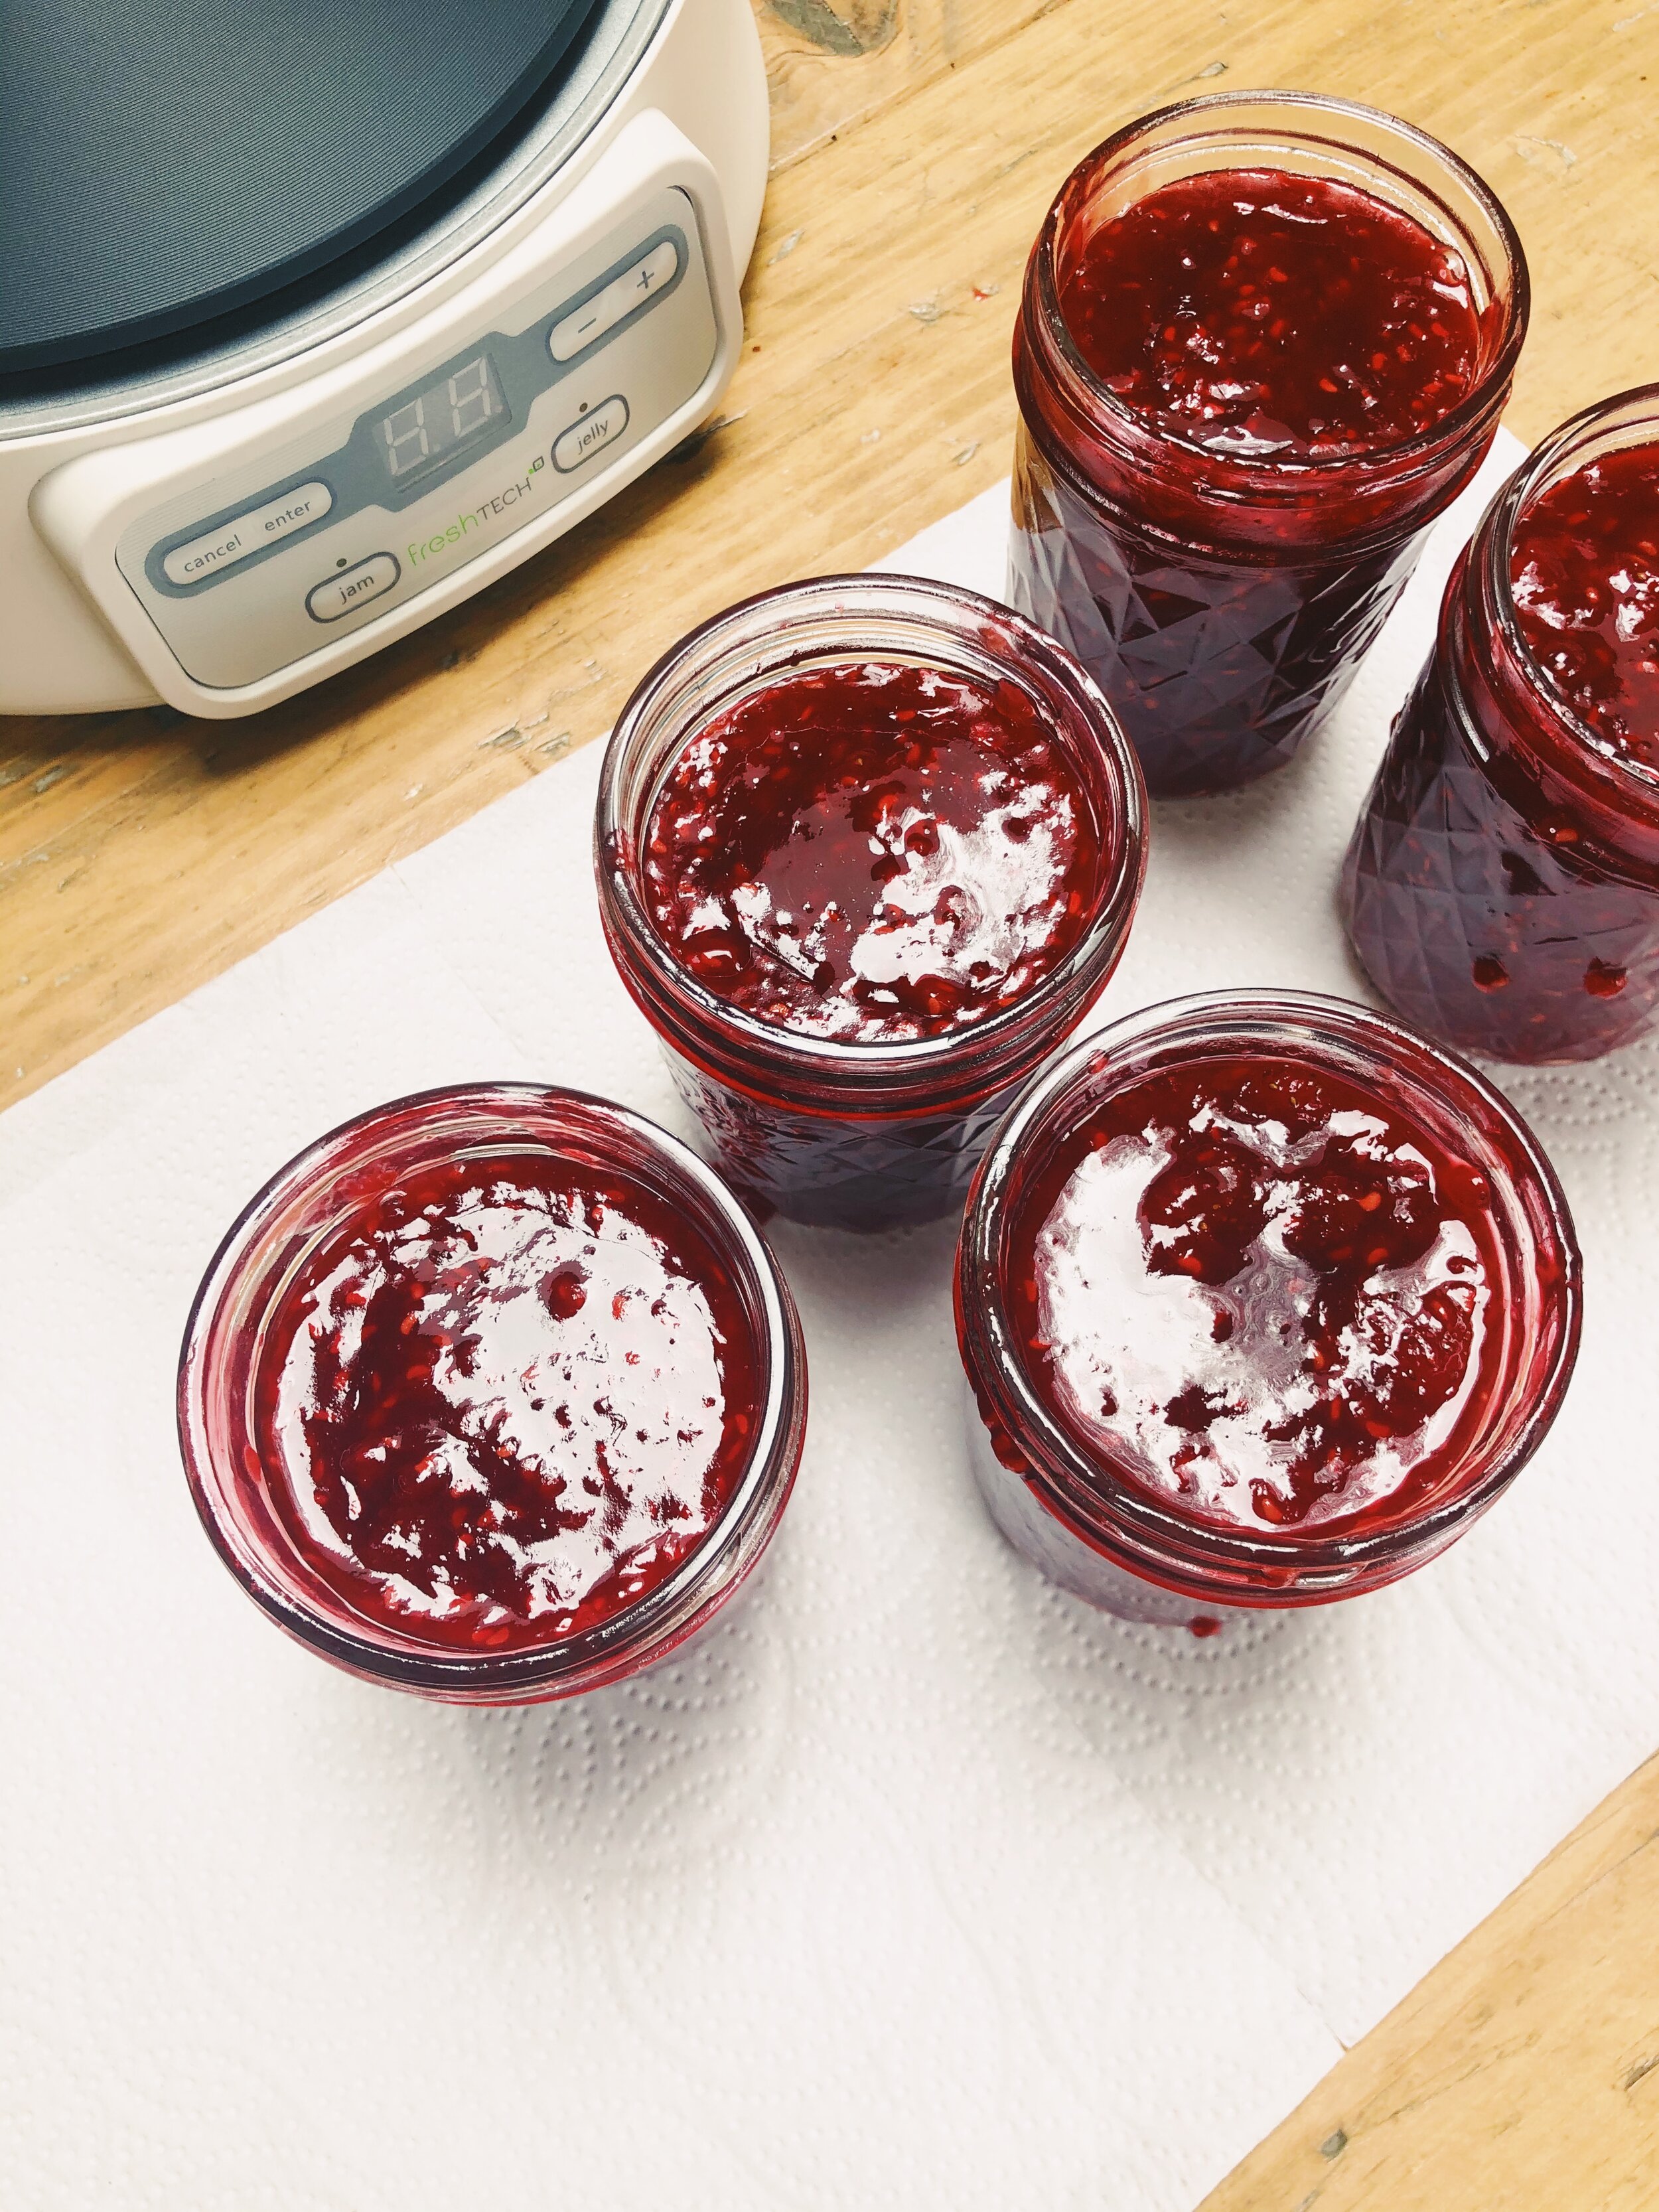
For the Jam (makes 4 jars. You will need one)
Using your Ball® freshTECH Automatic Jam & Jelly Maker
1kg crushed berries (I used a mix of home-grown strawberries and raspberries)
3 tbsp Ball jam setting mix with pectin
½ tsp butter
440g granulated sugar
For the buttercream icing
250g Mascarpone or cream cheese, at room temperature
200g Unsalted butter, softened
500g icing sugar, sieved
Juice of ½ lemon
1 tsp vanilla extract
Method
For the Jam (makes 4 jars of which you will need 1)
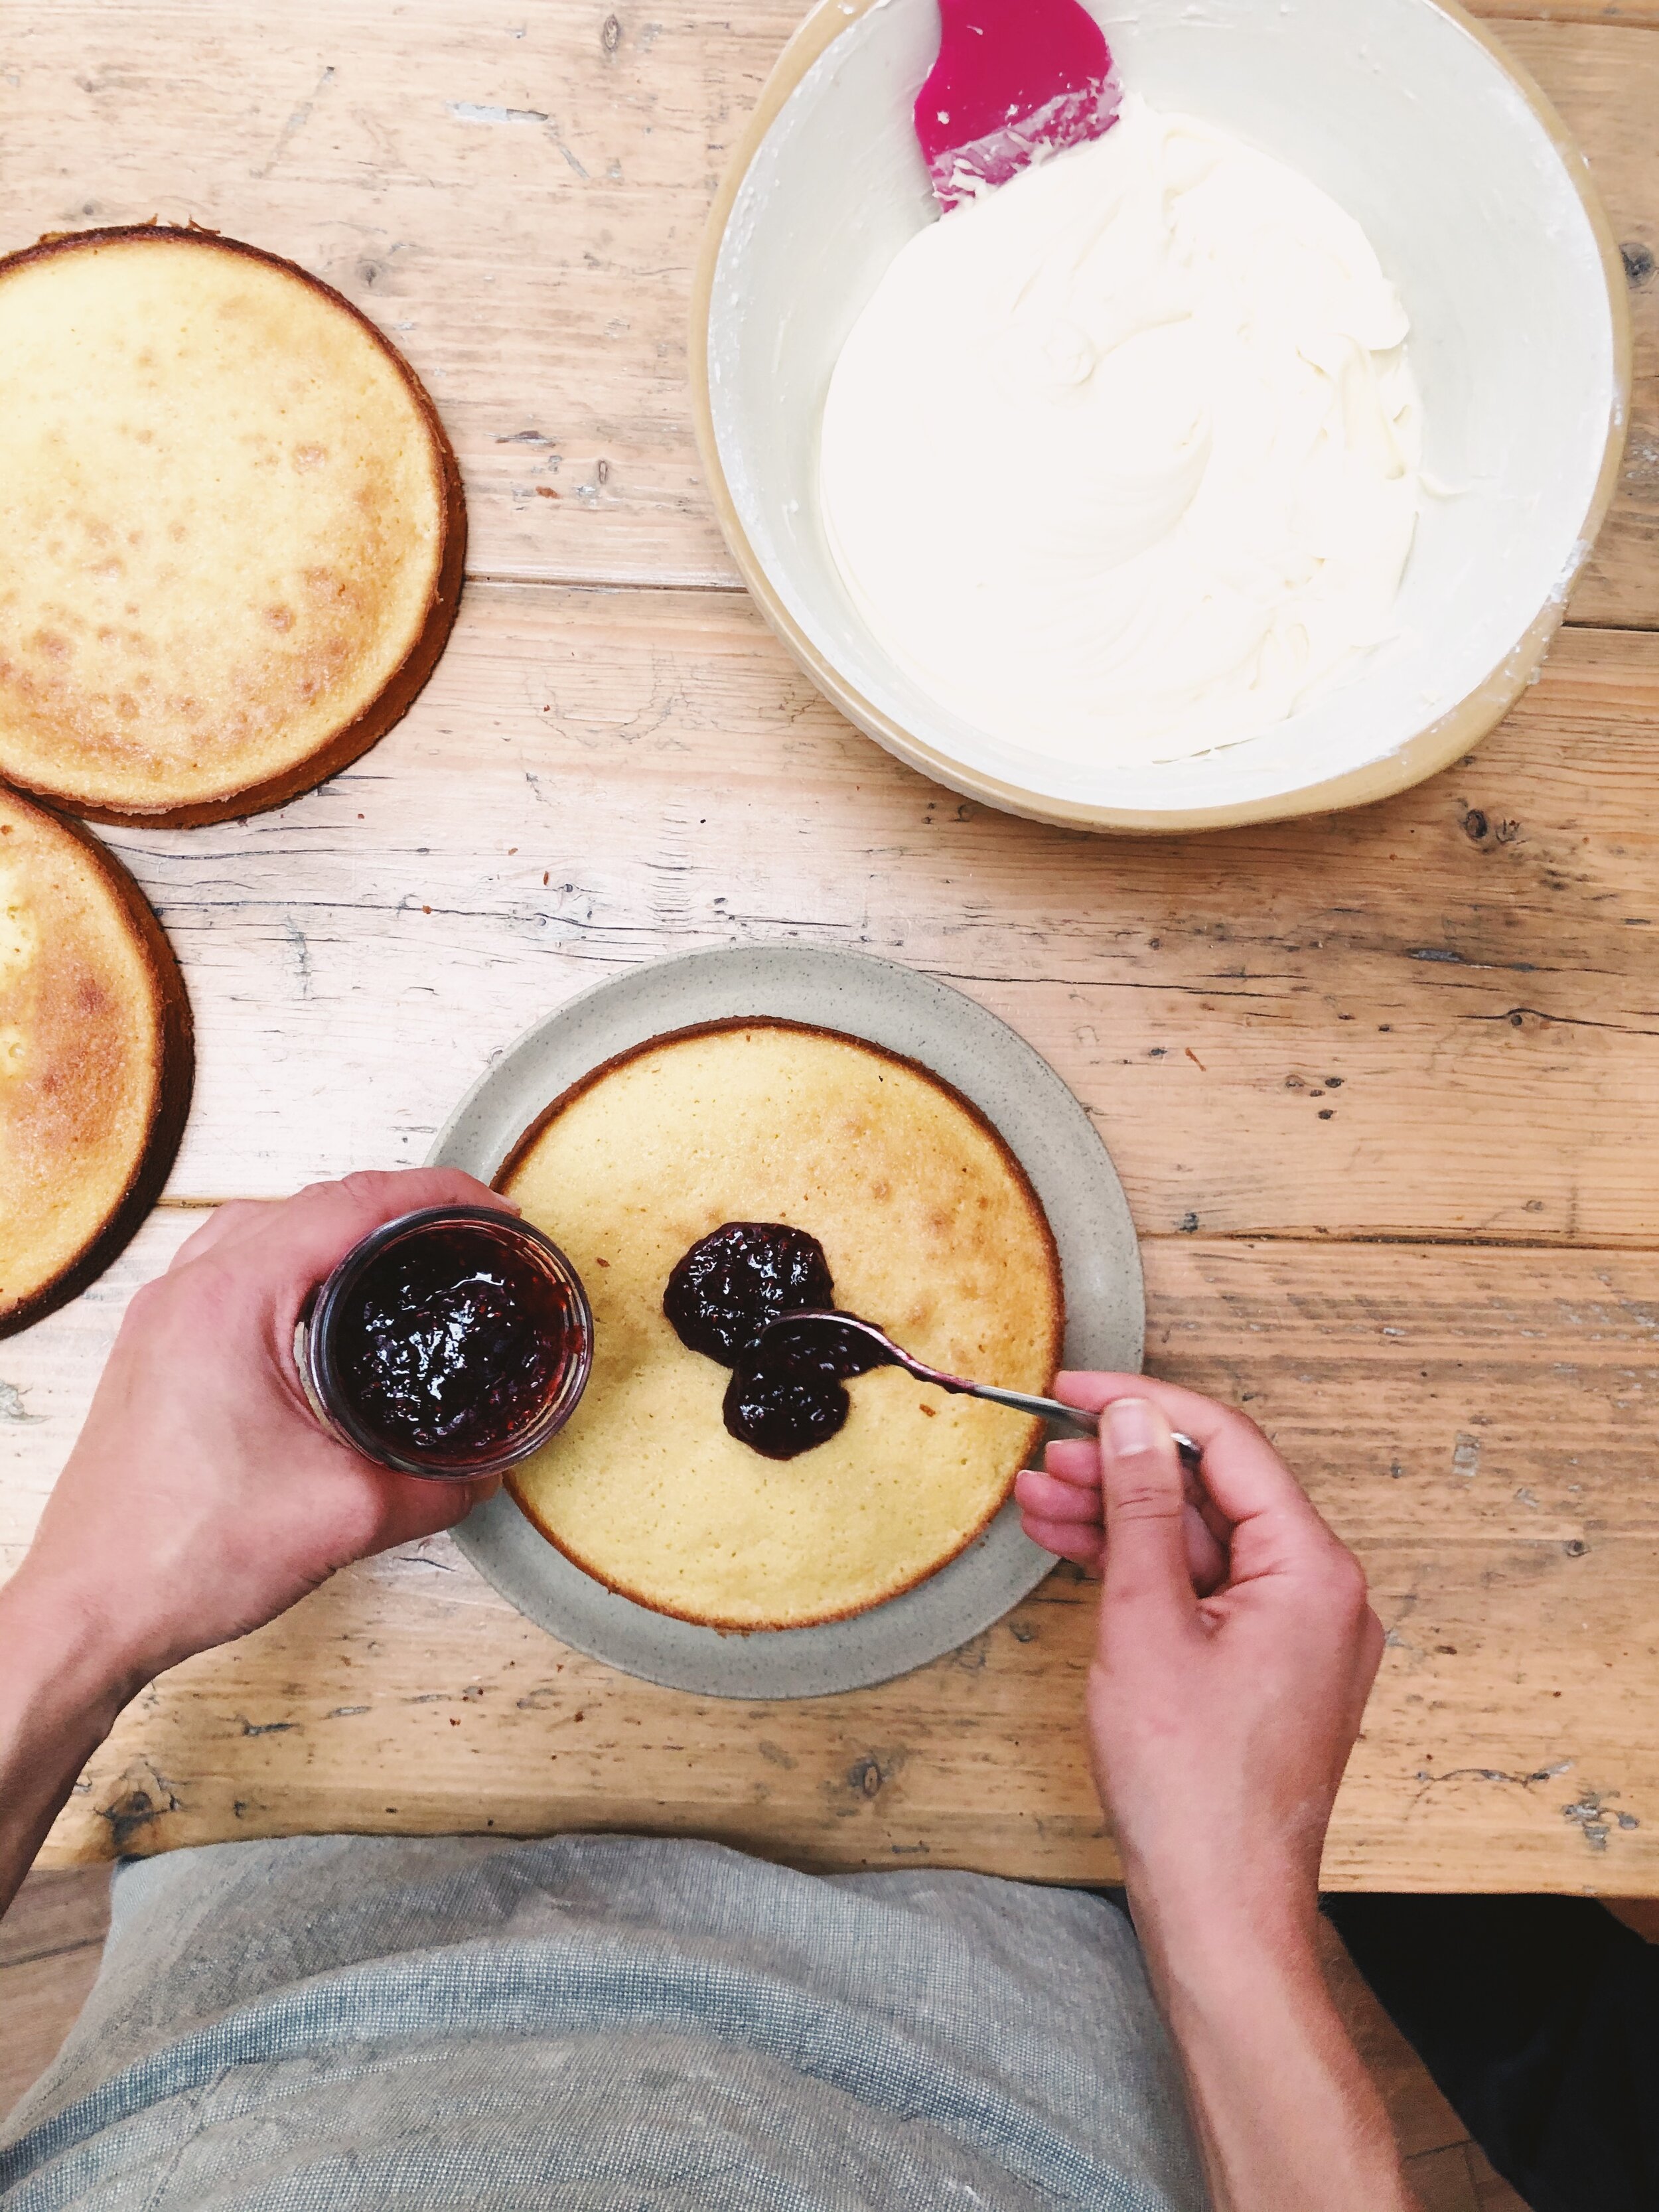
Wash the raspberries and strawberries under cool water and then remove the stems and hulls. Crush the strawberries using a masher (I like to use a potato masher)
Take out your Ball® freshTECH Automatic Jam & Jelly Maker and insert the stirrer. Sprinkle pectin evenly over the bottom of the pot and then add your crushed strawberries over the pectin. Add ½ tsp butter to help reduce foaming
Once ready, press the ‘jam’ button on your Ball® freshTECH Automatic Jam & Jelly Maker. The cook time will automatically show up as 21 minutes – press enter
Leave the Ball® freshTECH Automatic Jam & Jelly Maker for 4 minutes until it makes 2 short beeps, indicating that it is time to add sugar. Add sugar gradually while the stirrer continues running. Place the glass lid on the pot
The Ball® freshTECH Automatic Jam & Jelly Maker will continue to automatically stir your ingredients while it cooks. It will beep again at the end of the process signalling the jam cooking is complete. Press cancel, unplug the jam maker and immediately remove the glass lid. Then, remove the stirrer, using a potholder. Remove any foam on top of the jam, as necessary
Ladle the hot jam into warmed preserving jars immediately. Cool to room temperature, (about 30 minutes). Place lids on the jars (I like to use Ball’s® Mason preservings jars). Label. As this makes 4 jars, you can refrigerate the jam (not used for the cake) for up to 3 weeks.
Note: You should always heat jars (e.g. in the dishwasher, or through washing them with warm water) before adding hot jam to prevent jar breakage.
For the sponge:
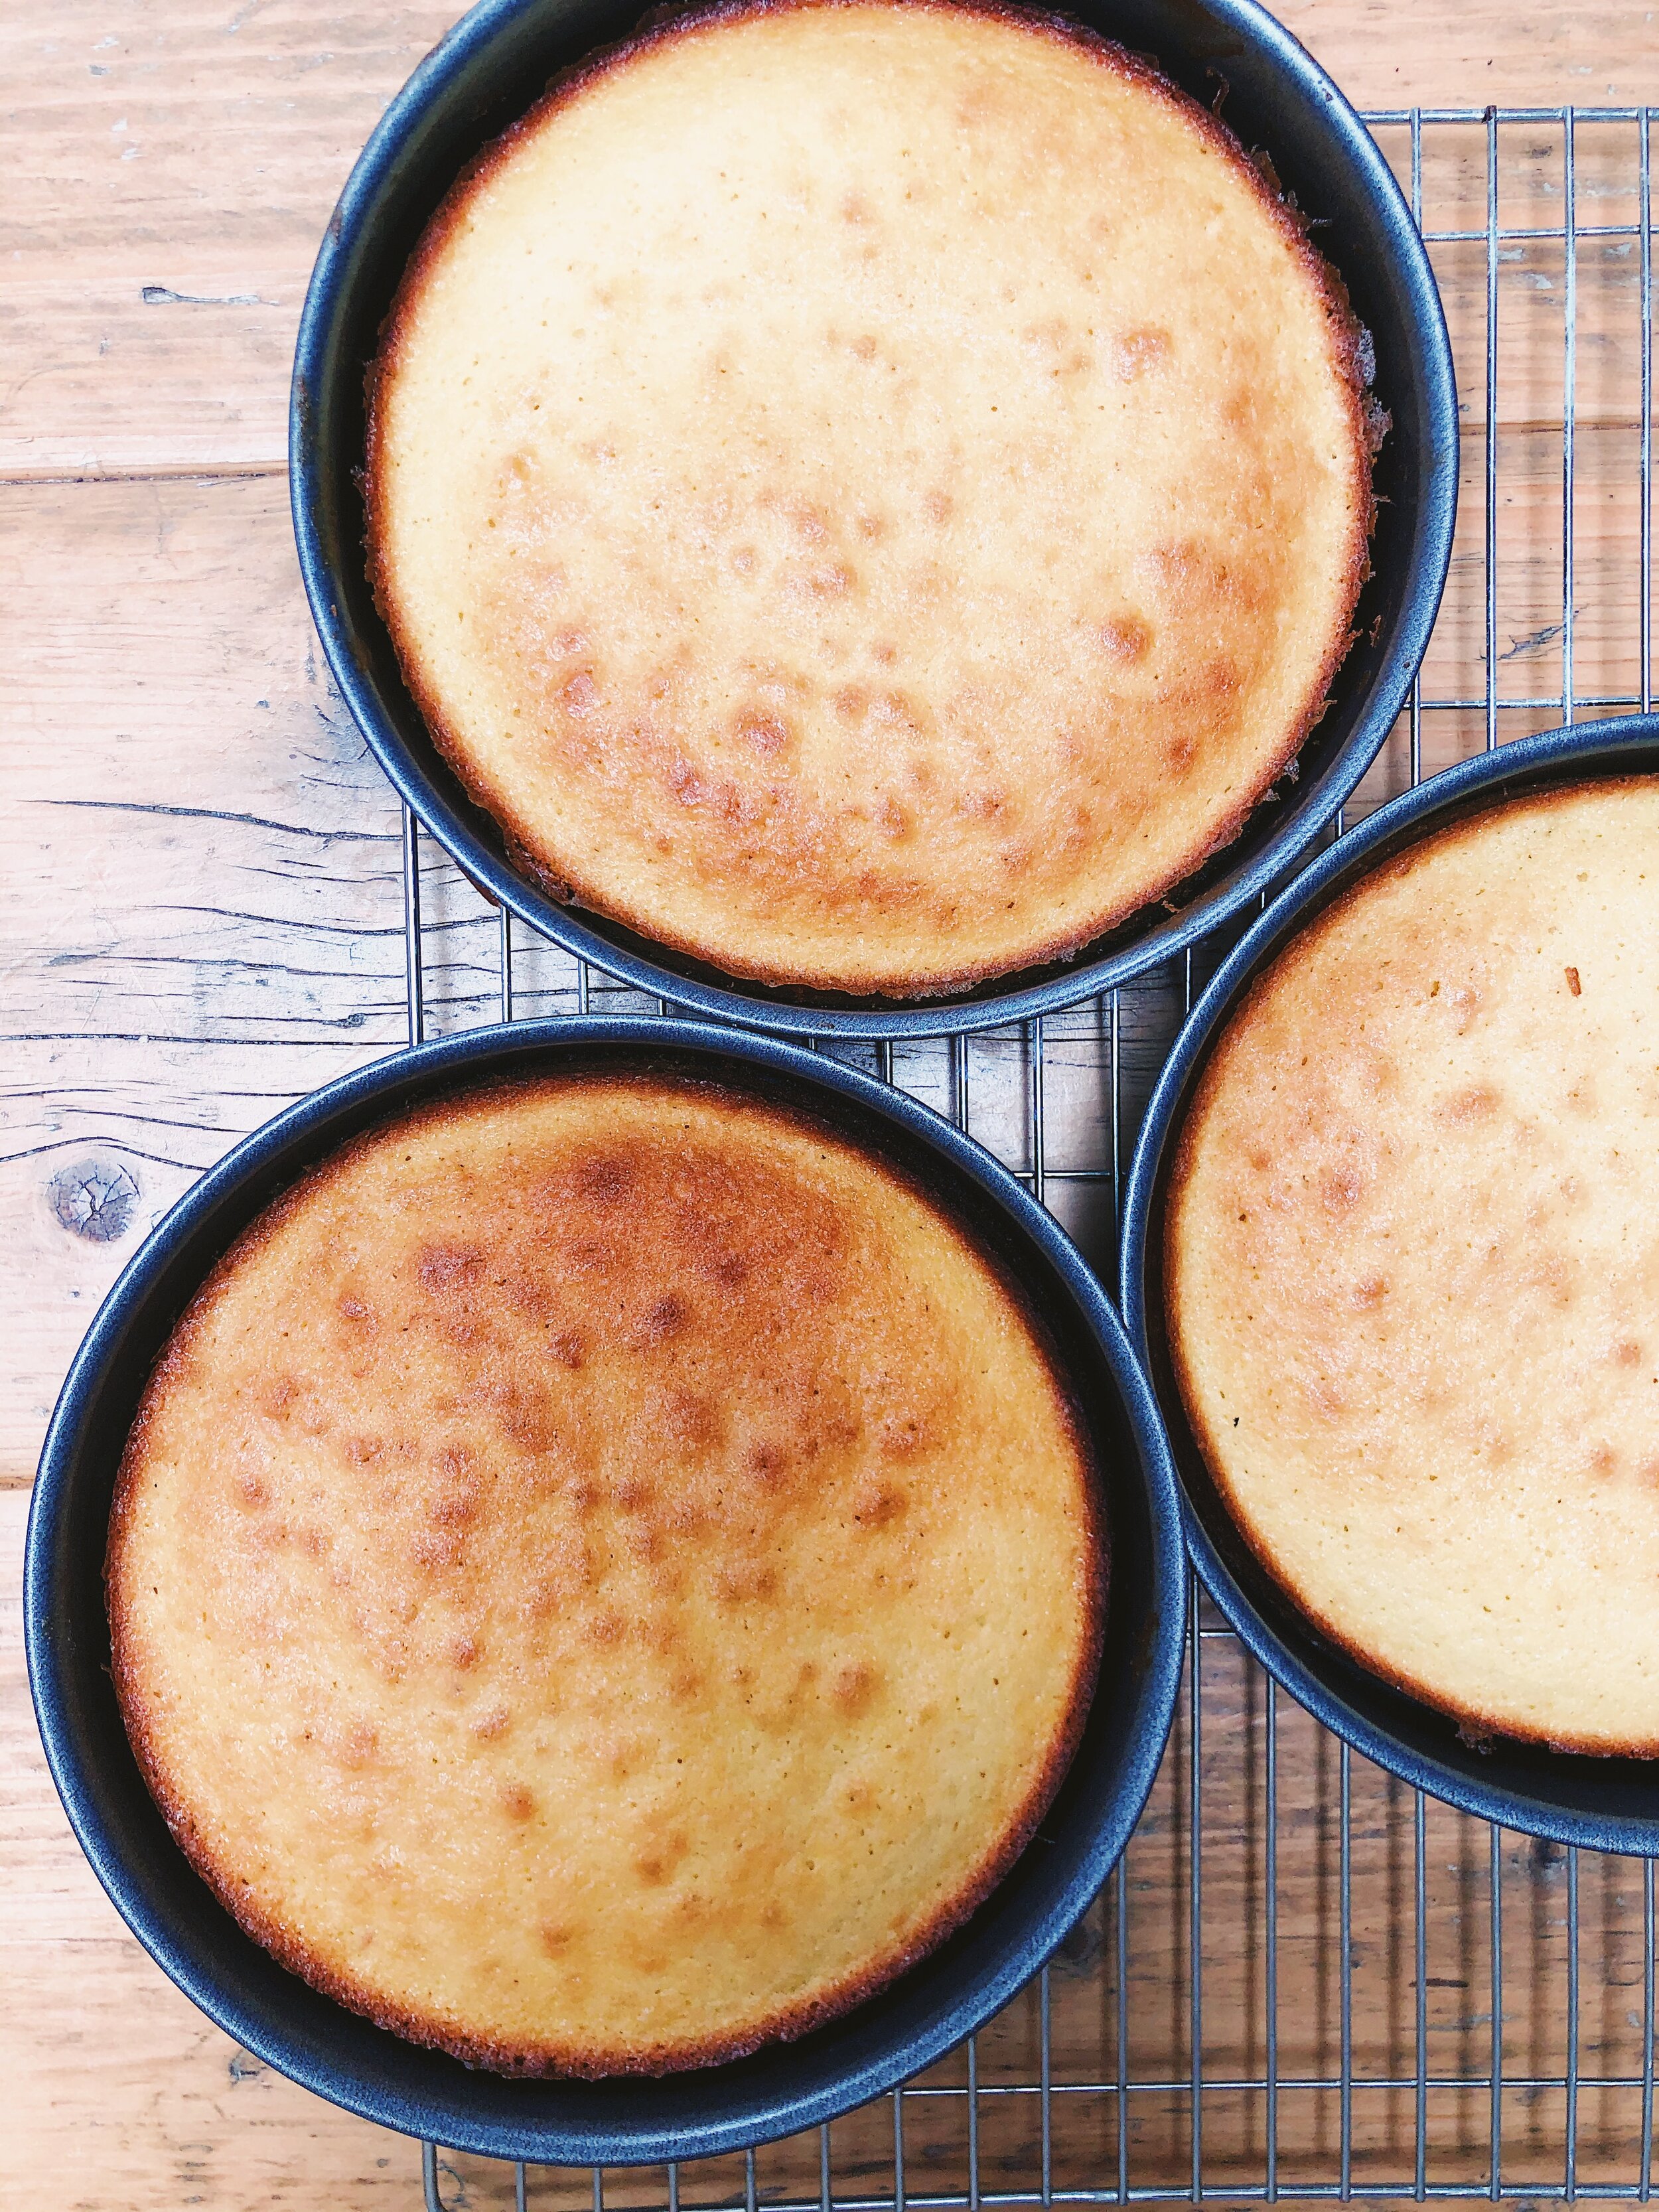
Preheat your oven to 180 degrees fan setting and butter and line three 8-inch cake tins
In a large mixing bowl, using an electric whisk beat together the butter and caster sugar until light and fluffy. Gradually add the beaten eggs beating well after each addition as you do (don’t worry if the mixture looks a little curdled)
Stir in the zest of the two lemons and just ¾ of the juice (keeping the remaining ¼ for the icing)
Gently fold in the sifted self-raising flour and arrange the mixture evenly into the prepared tins. (It should be about 430g mix per tin)
Bake for 25 mins until the cakes are golden brown and spongey to touch. Allow cakes to cool for about 10 mins in the tins before removing and allowing to cool fully on a wire rack
For the icing:
When the cake is ready to ice place the icing ingredients into a large bowl and beat using an electric whisk until smooth and creamy. You could also use a stand mixer.
The cakes should be relatively flat but if they are uneven level them off using a knife.
Place a dot of icing on the plate you intend to serve the cake on (this helps the first cake layer stay in place)
Spread a generous layer of jam over one of the cakes (making sure it goes to the edge of the cake) and a buttercream over the other. Then place the first cake jam side up on the serving plate and place the buttercream layer on top facing downwards. Repeat with the remaining cakes
Press the cakes down gently and give the cake a very thin layer of icing. (This is what’s known as a crumb coating). Allow the cake to rest in the fridge for 30 mins to firm up slightly
Spread the remaining buttercream around the sides and top of the cake. Dot a few spoonful’s of jam onto the sides and top of the cake and smooth the icing over to achieve a marbled affect
I like to decorate the bottom of the cake with a rim of raspberries.